WaterBridge Fabricating Inc.
Menu
  • Link IconLink IconLink Icon
  • External link opens in new tab or window
  • External link opens in new tab or window
  • External link opens in new tab or window
  • External link opens in new tab or window
  • External link opens in new tab or window

MV Columbia


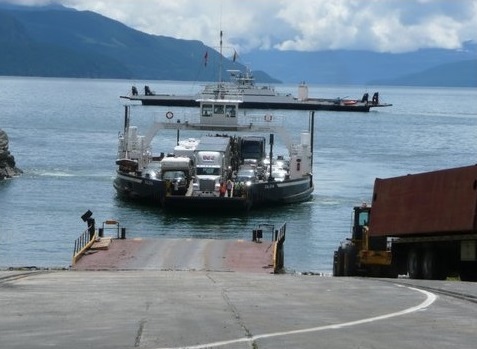
In June of 2012, WaterBridge Steel was awarded a contract by the Ministry of Transportation and Infrastructure to design and build an 80 car commercial ferry to run on the Shelter Bay to Galena bay route on Upper Arrow Lake in the Central Kootenays.  The ferry was to replace two smaller vessels that were reaching the end of their life-cycles.


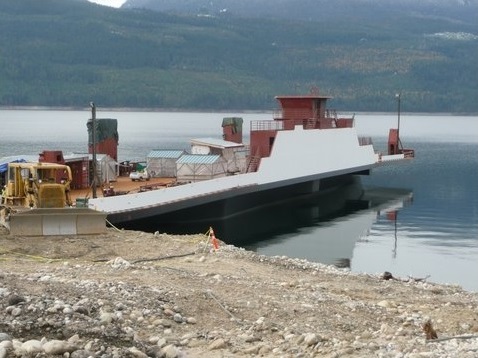
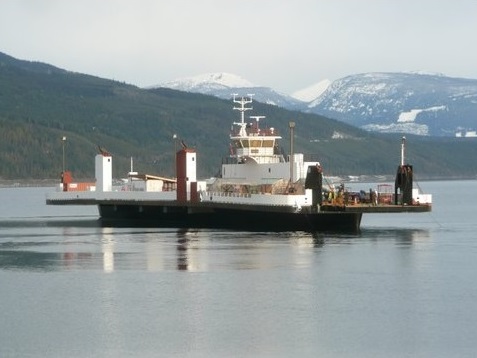
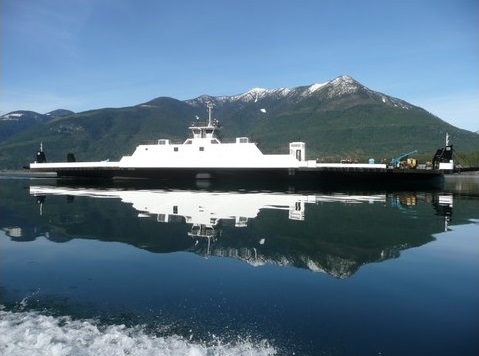
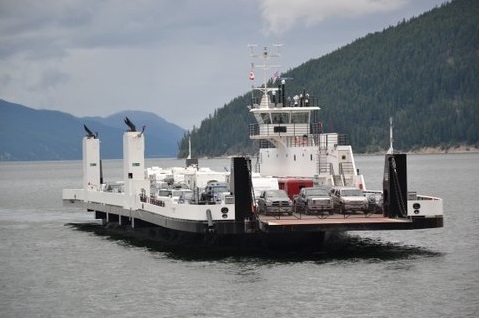
The new vessel, named the MV Columbia, is 320 feet long, 64 feet wide and weighs approximately 2.5 million pounds (1100 Metric Tons).  The new ferry was designed and built over a period of approximately 24 months on the shores of Upper Arrow Lake in the picturesque village of Nakusp, BC.  The MV Columbia was formally delivered to the BC Ministry of Transportation and Infrastructure and went into service on June 26, 2014.  Click External link opens in new tab or windowhere for a video of the hull launch.


The MV Columbia has brought several significant advantages to the Upper Arrow Lake crossing including the following, all of which have resulted in fewer waits and a more enjoyable crossing:

  • Increased capacity
  • Wider lanes and smoother ramp transitions has ensured rapid loading and unloading
  • More reliable
  • More environmentally friendly than the vessels she replaced
  • Deck de-icing system
  • Quiet, smooth sailing


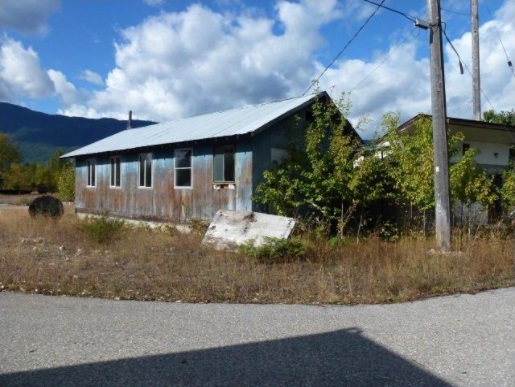
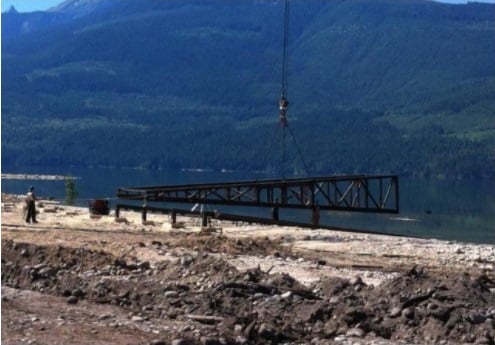
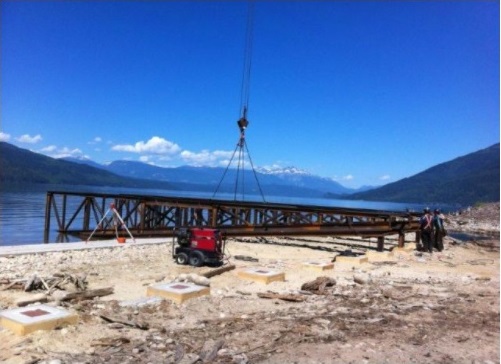
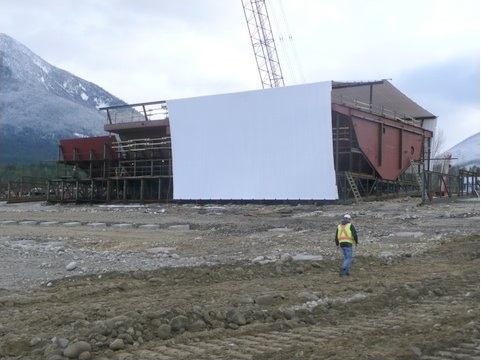
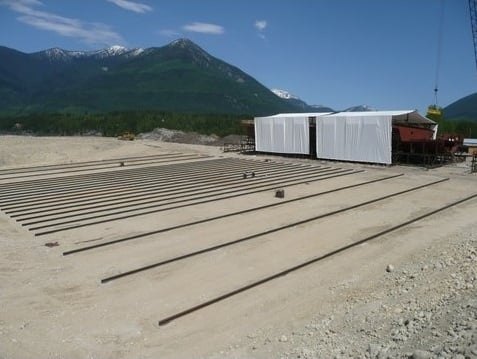
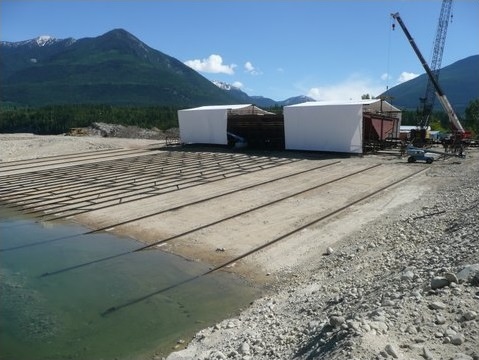
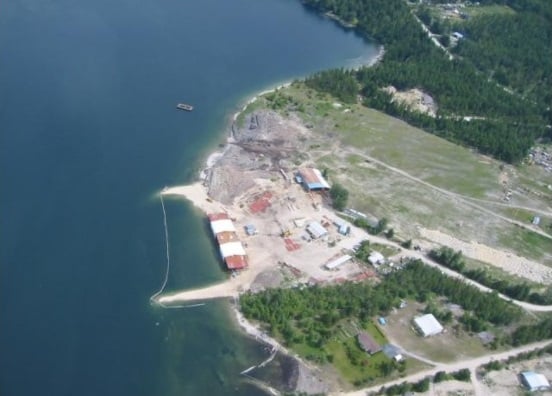
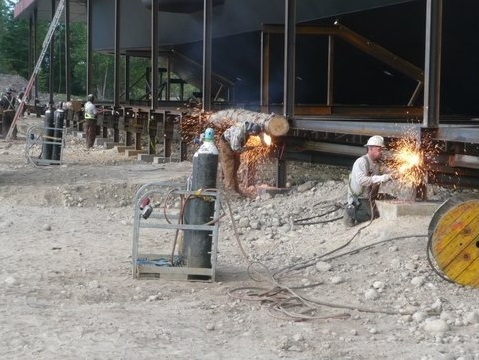
June - August 2012: Site Preparation.  Due to the size and complexity of the new vessel, it had to be built on-site on the shore of Arrow Lake.  WaterBridge found a good build site in Nakusp, BC, however the old Columbia Shake and Shingle Mill needed a lot of work to the be transformed into a ship yard. 

Before
Before
After
After
Before
Before
After
After
Before
Before
After
After
Before
Before
After
After
0

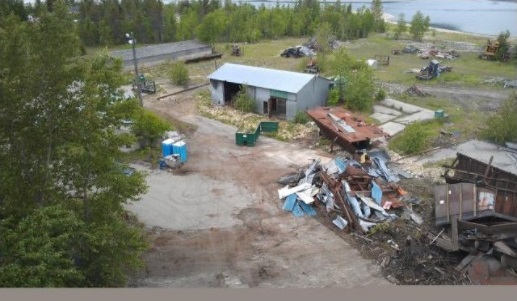
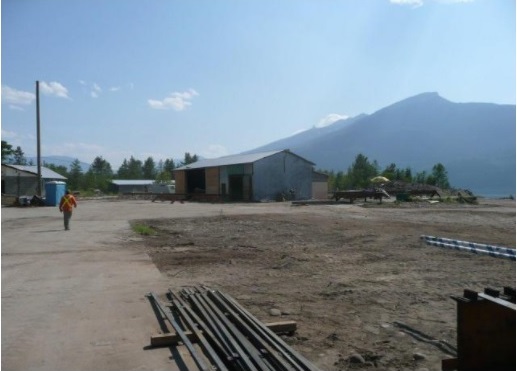
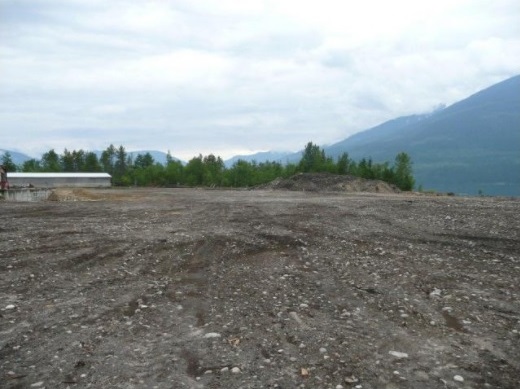
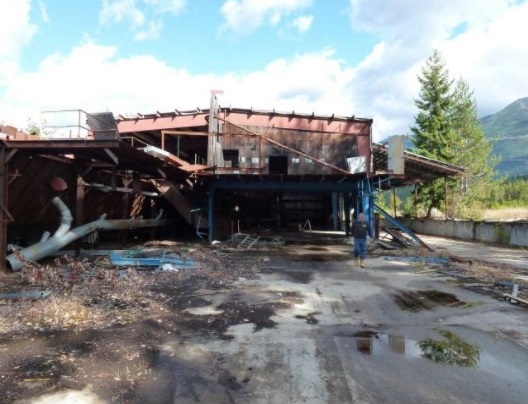
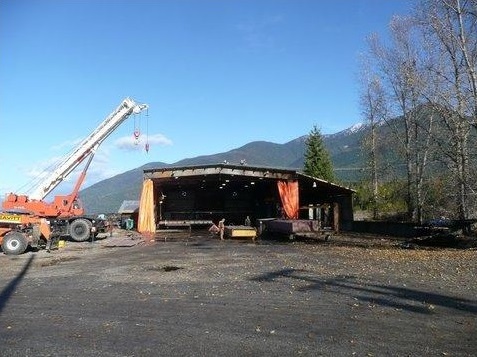
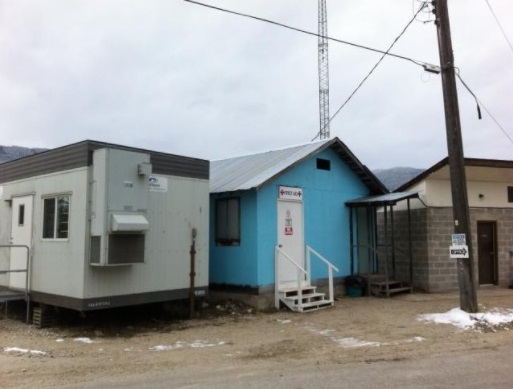
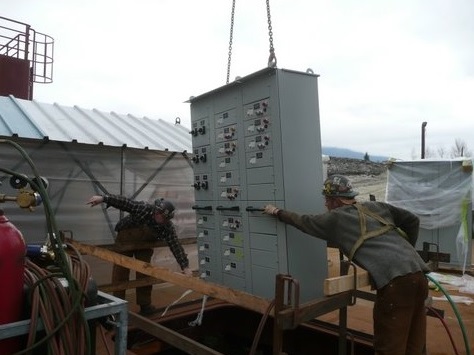
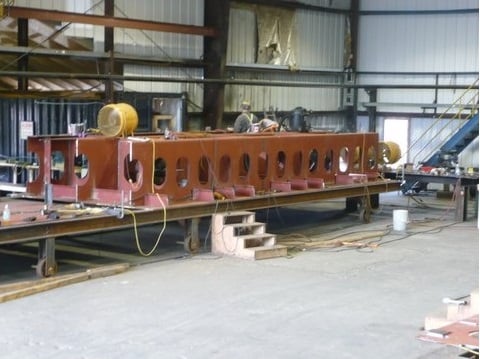
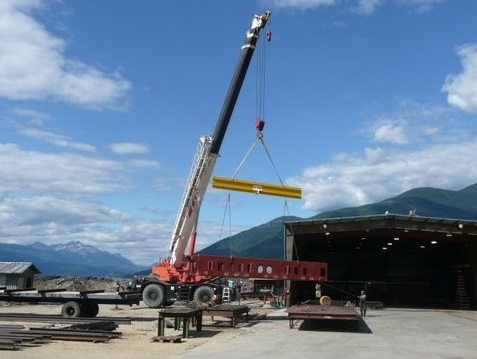
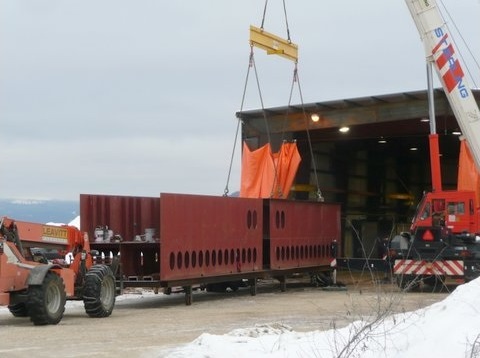
August - September 2012: Site Infrastructure Upgrades.   More than just site clean-up was required before we could start construction.   Between August and September of 2012, we had to do more than just clean up the site before construction could begin.  We upgraded mill buildings, and ran electricity several hundred yards to the lake shore to power welding equipment and other tools.  In this time, we also built and installed the structure which formed the foundation for assembling and launching the vessel.

https://0901.nccdn.net/4_2/000/000/05a/a3f/site-infrastructure.jpg
Heavy Construction Equipment Arrives On-Site
Old mill buildings were renovated and the service upgraded to become our fabrication shops.
The steel 'Wedges' were constructed and installed.  These structures formed the foundation on which the ferry was built and launched.
The steel 'Wedges' were constructed and installed. These structures formed the foundation on which the ferry was built and launched.
The traingular wedges served two purposes: they were a level base on which to construct the vesesl and secondly these wedges were mounted on rails which extended into the water.  When it came time to launch the ferry, the wedges slide down the rails into the lake carrying the vessel until it was deep enough to float off.
The traingular wedges served two purposes: they were a level base on which to construct the vesesl and secondly these wedges were mounted on rails which extended into the water. When it came time to launch the ferry, the wedges slide down the rails into the lake carrying the vessel until it was deep enough to float off.
0


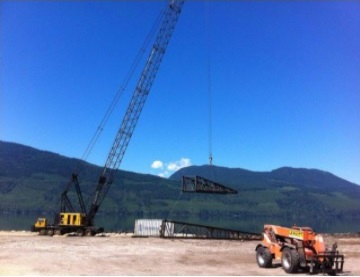
September 2012: Keel Laying.  Historically, in the ship building trade the laying of the keel is an important milestone.  This is the point that officially signifies the start of construction and the point at which the ship ceremoniously comes into existence.


The first section of the keel module in the fabrication shop.  Large sections of the ferry were fabricated and assembled in the site fabrication shops and then taken to the lake shore build-grid for final assembly on the vessel.
The first section of the keel module in the fabrication shop. Large sections of the ferry were fabricated and assembled in the site fabrication shops and then taken to the lake shore build-grid for final assembly on the vessel.
The first keel module being moved out of the fabrication shop.
Positioning the keel on the build grid.
The first section of keel laid.  This was the 28 foot mid-ship section of what became the 320 foot vessel.  This piece of the vessel weighed about 26, 000 pounds.
The first section of keel laid. This was the 28 foot mid-ship section of what became the 320 foot vessel. This piece of the vessel weighed about 26, 000 pounds.
0


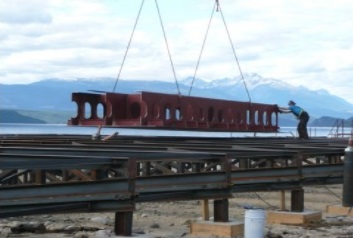
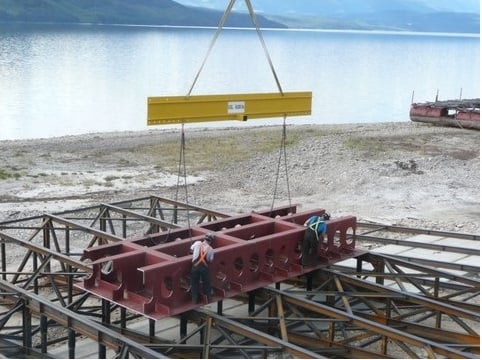
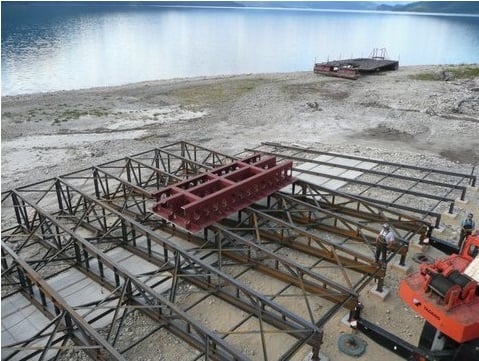
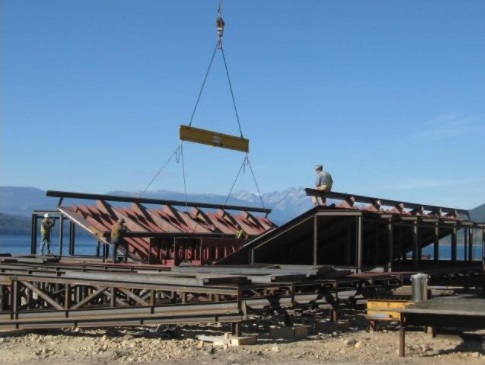
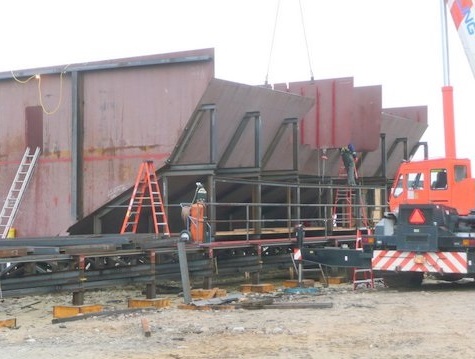
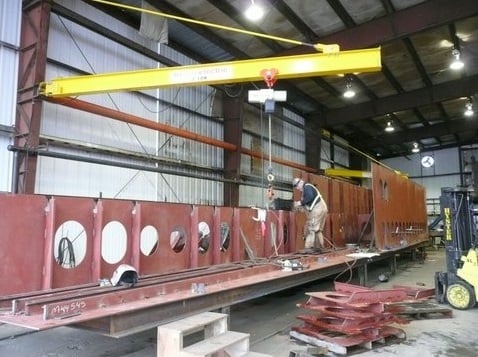
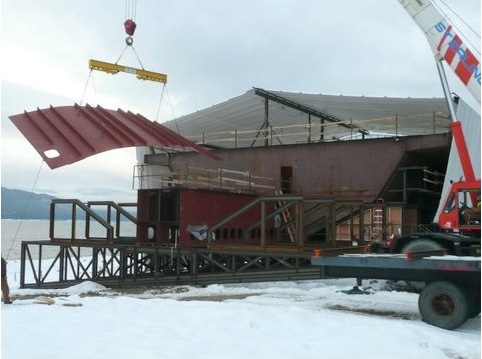
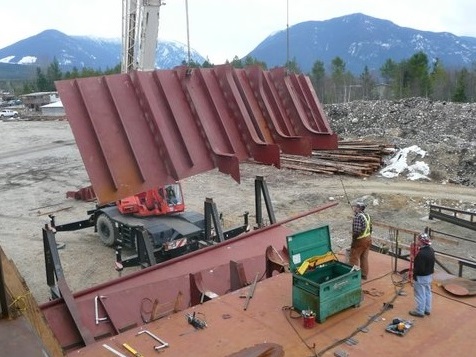
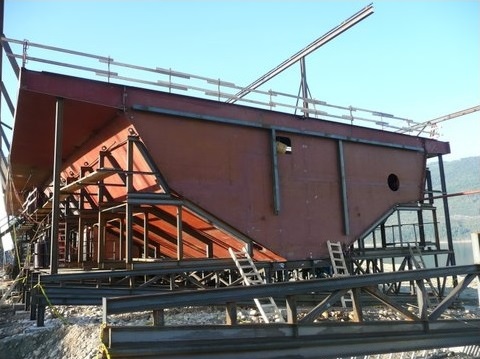
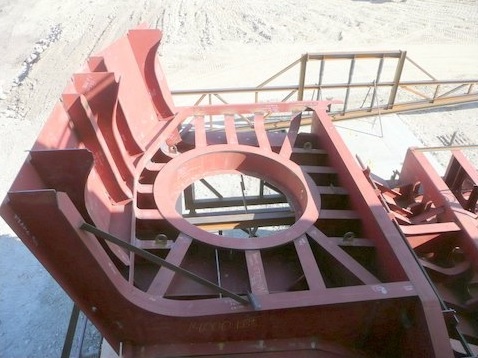
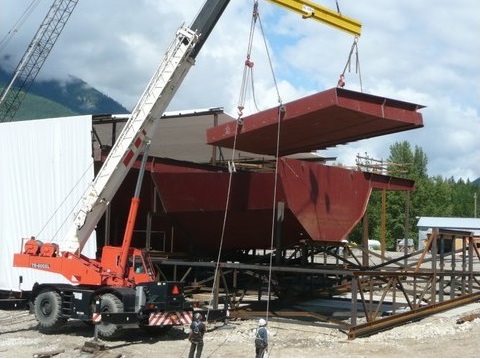
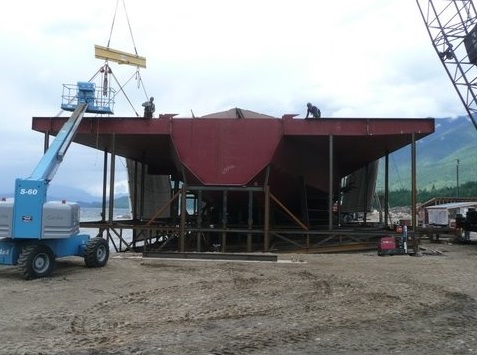
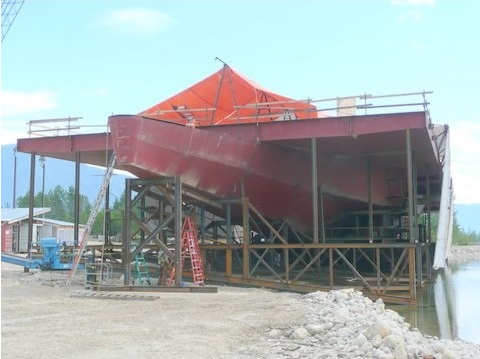
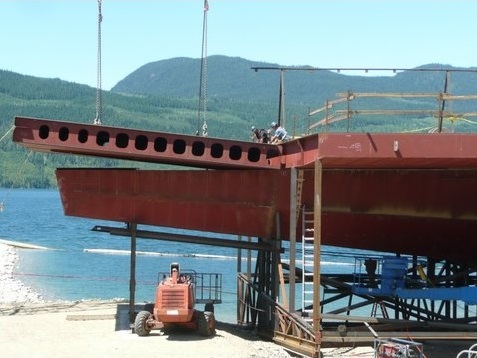
October - November 2012:  Midship Section Takes Shape.  The ferry was built from midship outward toward each end.  In October and November, the mid 56 feet of the vessel started to come together on the build grid.


In October and November, large sections of the midship were fabricated in the shops and then fitted onto the vessel.
Lower side-shells being fitted onto keel module.
https://0901.nccdn.net/4_2/000/000/046/6ea/midship-section-takes-shape.jpg
Bulkheads that form part of the engineering deck.
Engineering deck floor being lowered into place.
https://0901.nccdn.net/4_2/000/000/056/7dc/midship-section-takes-shape7.jpg
Transverse watertight bulkhead being fit-up.
Starting to have a boat-like shape!
0

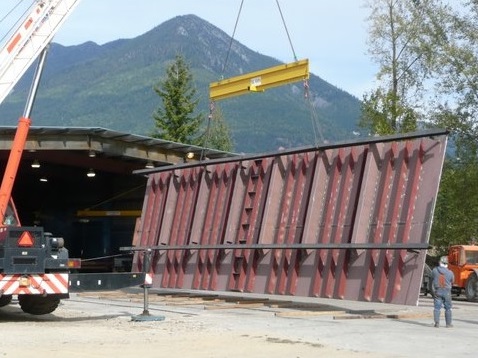
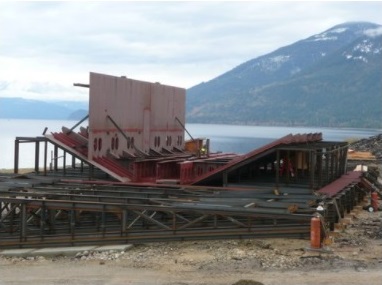
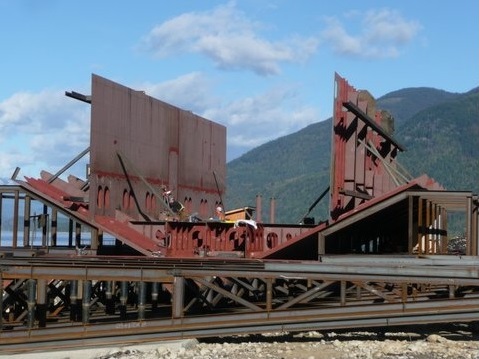
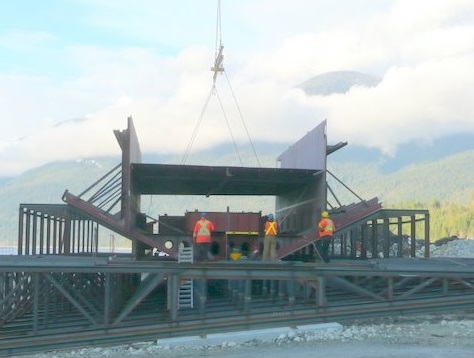
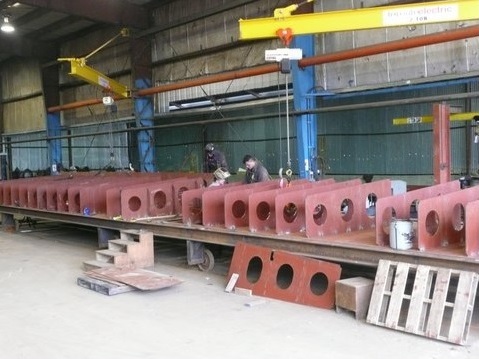
December 2012: The snow has come!  Also the start of fabrication of the next 64 meet of vessel (32 feet at each end) which will form both the engine rooms.

This is the engineering deck.  The card deck sits above, but here it was still open to the rain and snow making for a difficult work environment.  The sooner the car deck went on, the easier it was to complete the interior welding.
This is the engineering deck. The card deck sits above, but here it was still open to the rain and snow making for a difficult work environment. The sooner the car deck went on, the easier it was to complete the interior welding.
Upper Starboard Sideshell installed.
Port sponson installation.  The cantilever formed part of the car deck allowing for more deck space while still having an efficient narrow hull.
Port sponson installation. The cantilever formed part of the car deck allowing for more deck space while still having an efficient narrow hull.
Starboard sponson installation.
Almost ready for the car deck to be installed on this section, enclosing the mid-ship form the weather.
While the construction continued outside on the build grid, the guys in the shop were fabricating the hull modules for the next two 32 foot sections of the vessel.  The next sections housed the forward and aft engine rooms.
While the construction continued outside on the build grid, the guys in the shop were fabricating the hull modules for the next two 32 foot sections of the vessel. The next sections housed the forward and aft engine rooms.
0


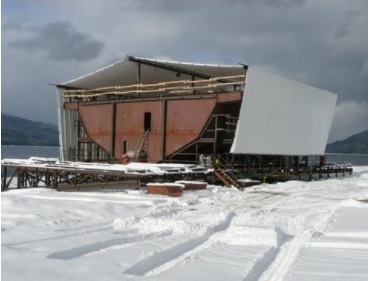
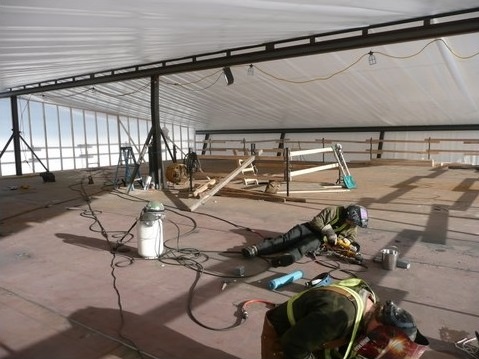
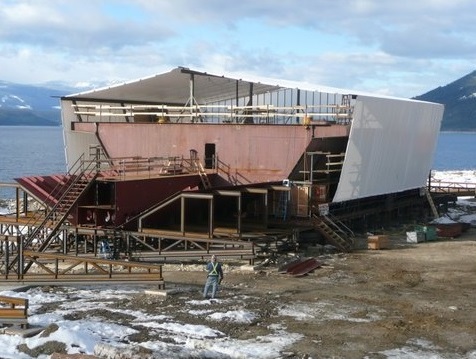
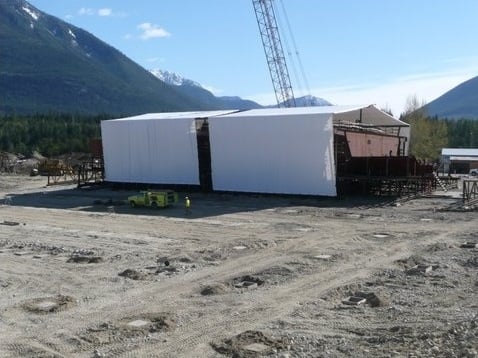
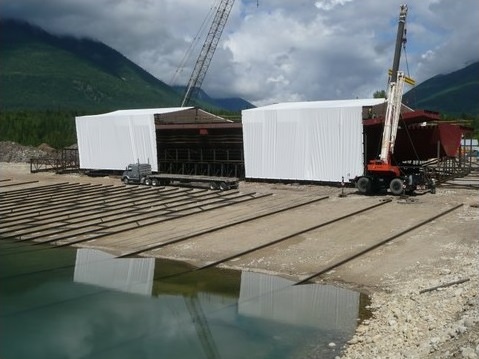
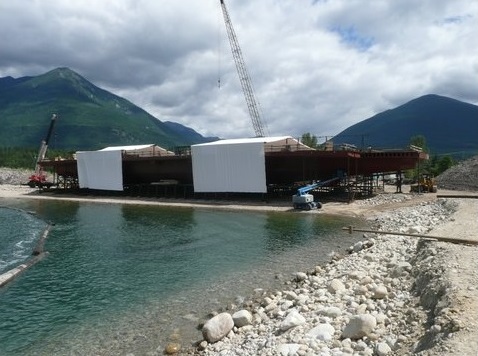
January - February 2013:  Working under the big top.  Covering the hull is one of two 60' x 120' tarps we used to effectively work in all weather conditions.


Midship section covered from the elements.  We also used two large diesel heaters to keep the inside working conditions as comfortable as possible.
Midship section covered from the elements. We also used two large diesel heaters to keep the inside working conditions as comfortable as possible.
Welding the seams on the car deck.
Working inside the hull.
Next two 30 foot keel modules leaving the shop.
The next two sections of the vessel begin assembly.  The 30 foot fore and aft sections being added will house the engine rooms.
The next two sections of the vessel begin assembly. The 30 foot fore and aft sections being added will house the engine rooms.
The middle keel sections shown here will become one of two main fuel tanks for the vessel.
This section of the hull starts taking shape.
Adding another piece of the side-shell of the vessel.
You have to like climbing ladders to do this job....
Fabrication continues at a fast pace in the shop.
0


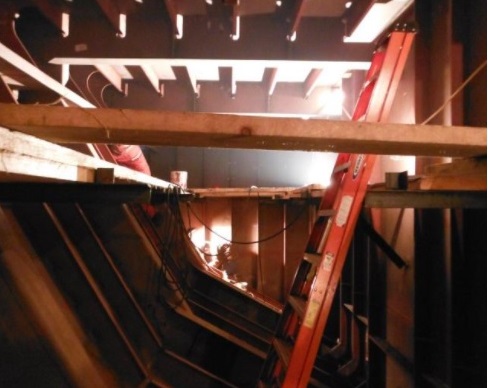
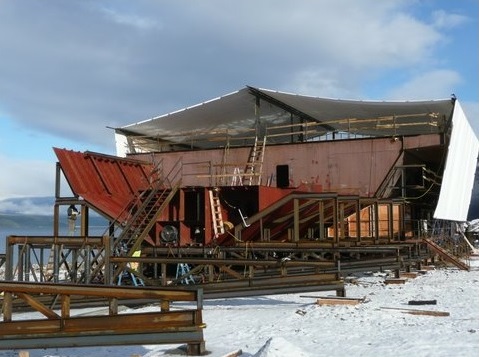
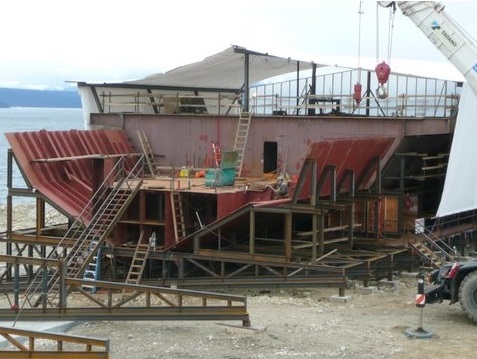
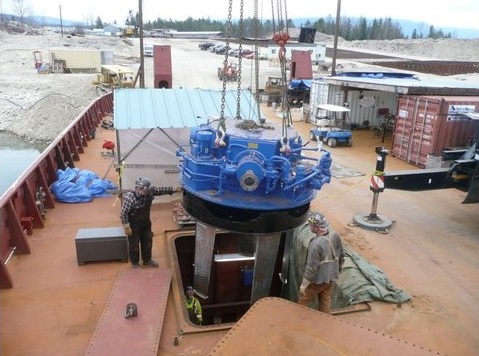
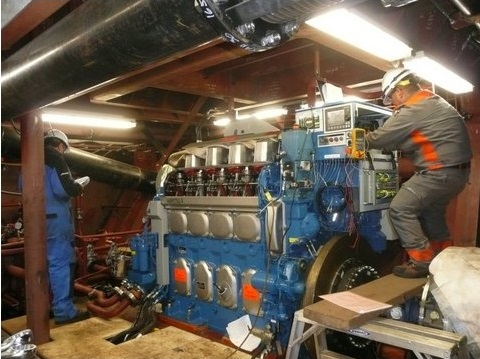
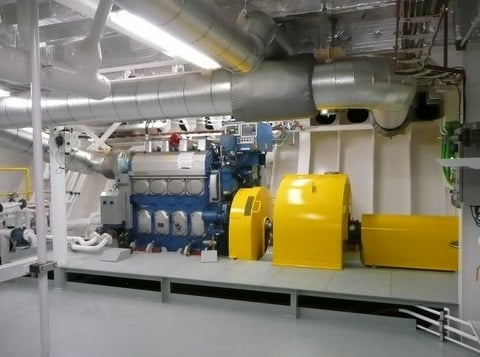
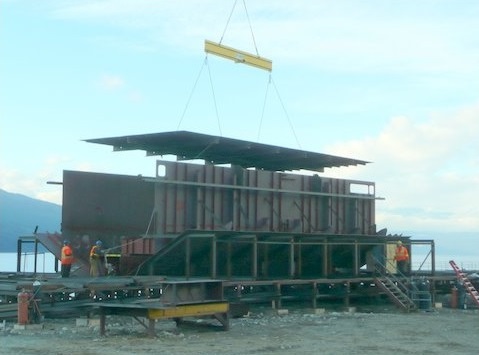
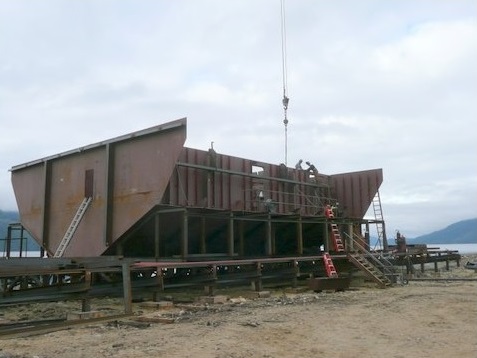
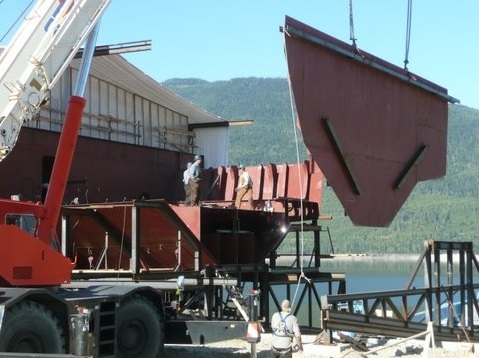
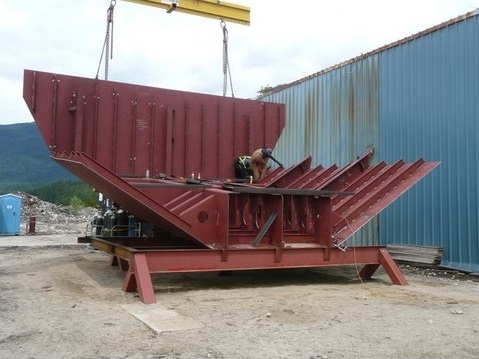
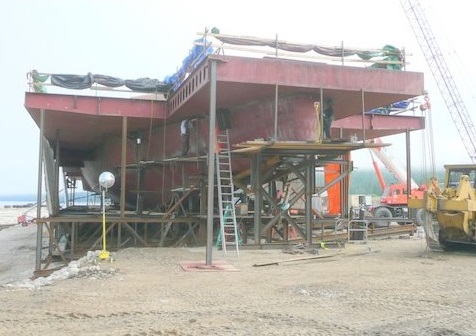
March - April 2013: Constructing the engine and drive modules.  An early end to winter was much appreciated!


Aft Module 2 (Engine Room 2) near completion.
Forward Module 2 (Engine Room 1) being assembled (left side of picture).
Forward Module 2 (Engine Room 1) near completion.
Interior of Engine Room 1
Keel for aft module 3 being set in place.  This is where the keel starts to rise up toward the stern of the ship.
Keel for aft module 3 being set in place. This is where the keel starts to rise up toward the stern of the ship.
Forward Module 3 being assembled.  These modules will house the drive units (Propeller Systems).
Forward Module 3 being assembled. These modules will house the drive units (Propeller Systems).
This view shows the preparation of the beach for the launch of the vessel.  By mid-summer, when the lake level rose, the truck in the foreground was submerged in water.  The vessel was launched side-ways during the high water period that summer.
This view shows the preparation of the beach for the launch of the vessel. By mid-summer, when the lake level rose, the truck in the foreground was submerged in water. The vessel was launched side-ways during the high water period that summer.
One of the drive beds fitted on the vessel.  This complex steel structure is the seating for one of two Voith Schneider Propeller units.
One of the drive beds fitted on the vessel. This complex steel structure is the seating for one of two Voith Schneider Propeller units.
0


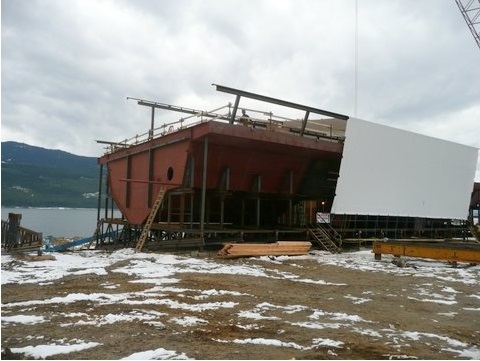
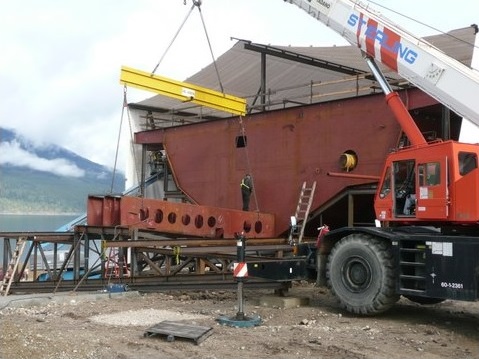
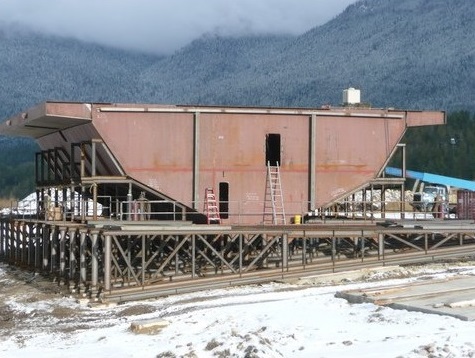
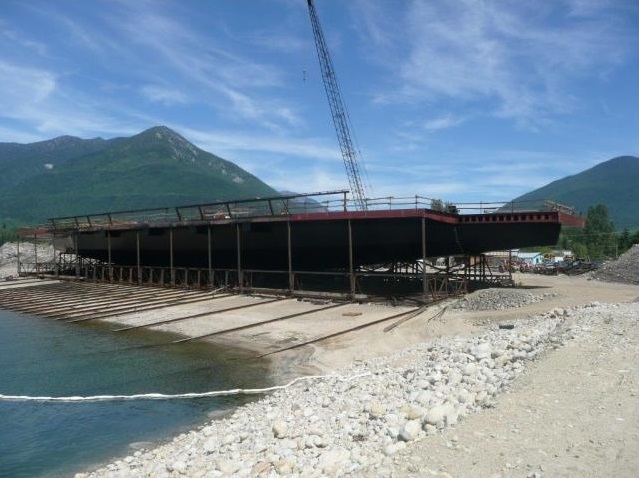
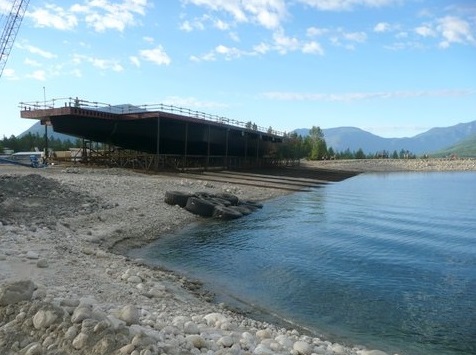
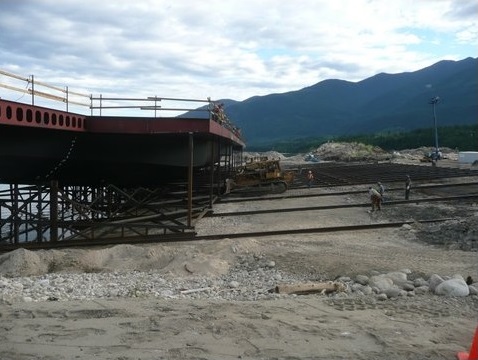
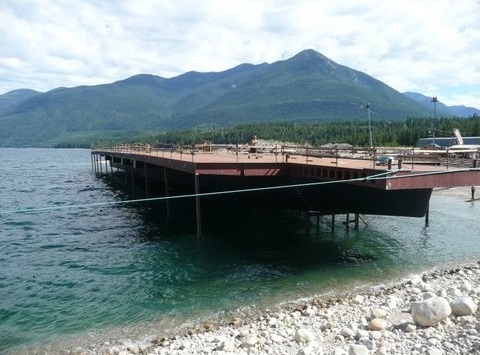
May - June 2013: Racing Against the Rising Water.


Forward Module 3 (Drive Room 1) being fit-up
Module 4 fabrication.  This is the first compartment on the vessel that is purely void space, housing no machinery or engineering equipment.
Module 4 fabrication. This is the first compartment on the vessel that is purely void space, housing no machinery or engineering equipment.
Module 4 fit-up
Module 4 fit-up
Module 5 assembled on grid.  The hull narrows dramatically starting at module 4 forward while the car deck remains the same width.  This give the 'aircraft carrier' appearance.
Module 5 assembled on grid. The hull narrows dramatically starting at module 4 forward while the car deck remains the same width. This give the 'aircraft carrier' appearance.
With both module 5s (fore and aft) fit-up, the hull is now 264 feet out of its final 320 feet.  Only the two bow/stern modules remain.
With both module 5s (fore and aft) fit-up, the hull is now 264 feet out of its final 320 feet. Only the two bow/stern modules remain.
Over the course of May and June, the water rose 30 feet vertically (which translated into about 300 feet of beach).  We rushed to complete the launch ways as the water came to meet us.  The next few shots show the water progression.
Over the course of May and June, the water rose 30 feet vertically (which translated into about 300 feet of beach). We rushed to complete the launch ways as the water came to meet us. The next few shots show the water progression.
https://0901.nccdn.net/4_2/000/000/024/ec9/launchways2.jpg
https://0901.nccdn.net/4_2/000/000/06b/a1b/launchways3.jpg
Water at our doorstep.  Now we race toward the hull launching date.
Water at our doorstep. Now we race toward the hull launching date.
Here is a great aerial shot of the vessel and build site taken on June 29, 2013.  We are very thankful to a local pilot for sending us some photos!
Here is a great aerial shot of the vessel and build site taken on June 29, 2013. We are very thankful to a local pilot for sending us some photos!
0


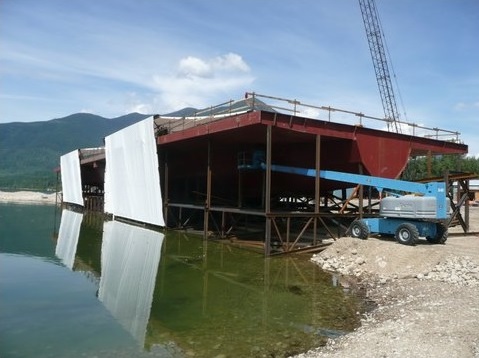
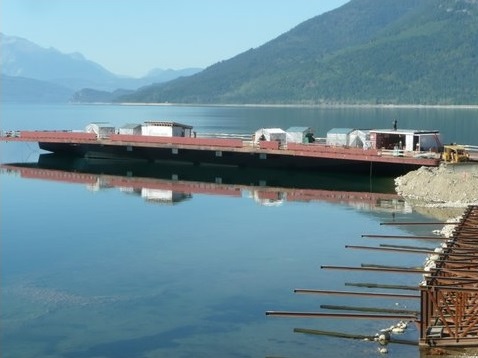
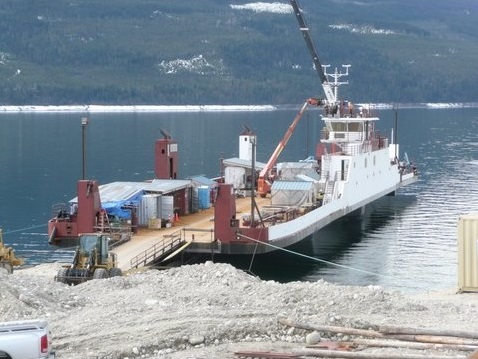
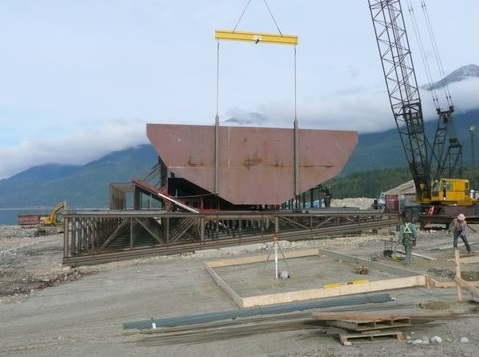
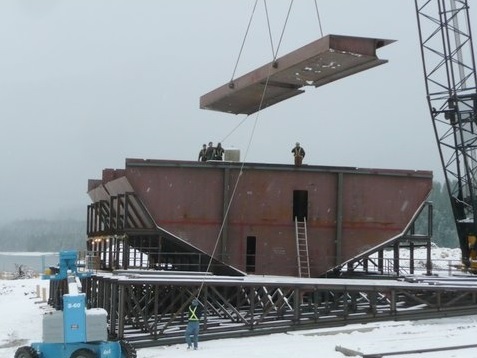
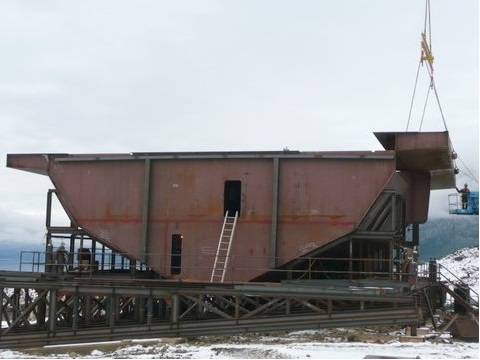
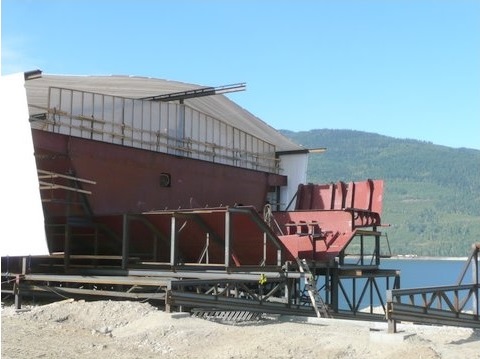
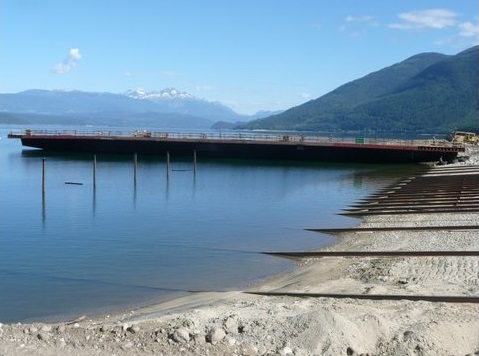
July 2013: The Race to Complete the Hull for Launch.  The hull of the vessel was launched virtually empty and with no deck-house built yet.  This allowed for the lightest vessel weight possible for a controlled side--launch.  The machinery and deck-houses were completed when the vessel was in the water.


https://0901.nccdn.net/4_2/000/000/06b/a1b/fitting-bow-and-stern-modules.jpg
Fitting the bow and stern modules.  19 days before launch!
Fitting the bow and stern modules. 19 days before launch!
The last piece of deck to fit before launch.  The remainder was fitted when the vessel was in the water.  This minimized the launch weight as much as possible.
The last piece of deck to fit before launch. The remainder was fitted when the vessel was in the water. This minimized the launch weight as much as possible.
https://0901.nccdn.net/4_2/000/000/05a/a3f/10-days-before-launch.jpg
10 days before launch.  Frantically finishing the welding on the hull so the painters can come in.
10 days before launch. Frantically finishing the welding on the hull so the painters can come in.
July 27, 2013.  1 day to launch!
Paint is dry, deck is cleared, we are ready to go!
July 27, 2013. 1 day to launch! Paint is dry, deck is cleared, we are ready to go!
0


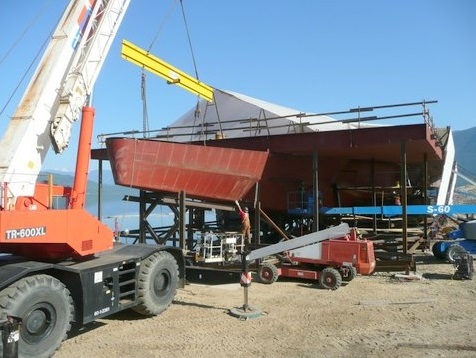
July 28, 2013: Launch Day Finally Arrives!


6 am, morning of launch.  Everyone is stressed but eager to get this vessel in the water.  The vessel and the entire steel cradle underneath will slide down the rails into the water.  Once it hits deep enough water, the vessel will float off the cradle.  That's the plan anyway!
6 am, morning of launch. Everyone is stressed but eager to get this vessel in the water. The vessel and the entire steel cradle underneath will slide down the rails into the water. Once it hits deep enough water, the vessel will float off the cradle. That's the plan anyway!
The crew cuts the last ties that hold the giant launch cradle in place on the sloped rails that form the launch-way.
Gravity alone was not quite enough so we gave it a push with a few excavators.
When the excavators ran out of ground, we gave it a pull with a couple of tug boats.
After a long 14-hour day of changing rigging, pushing, pulling, and nudging, the vessel floats for the first time.  Here we have pulled it into shore bow first.  This is where the remainder of the construction will take place.
After a long 14-hour day of changing rigging, pushing, pulling, and nudging, the vessel floats for the first time. Here we have pulled it into shore bow first. This is where the remainder of the construction will take place.
0


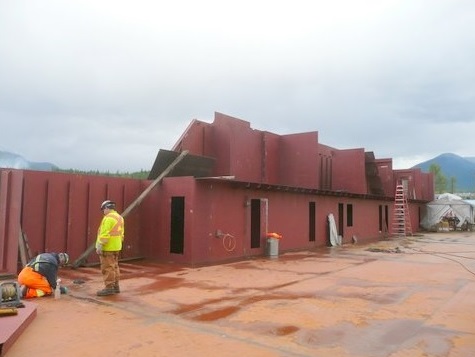
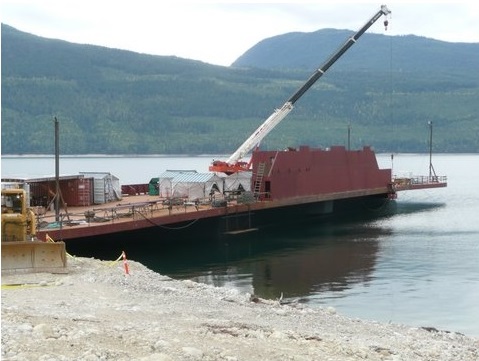
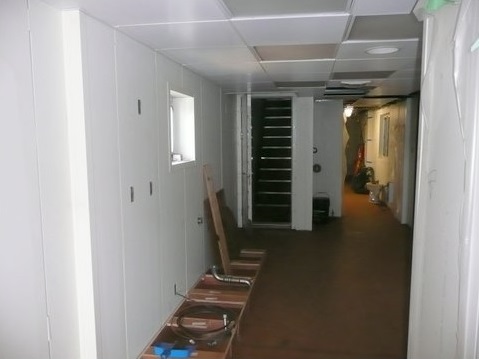
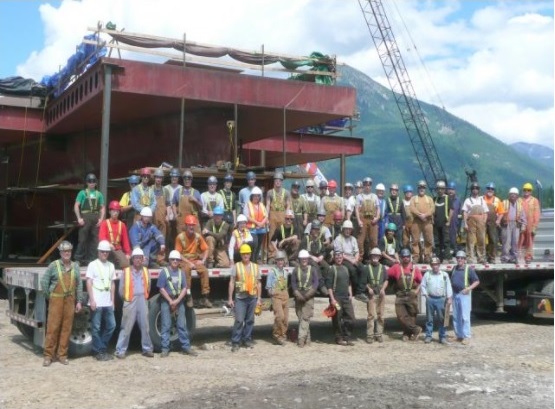
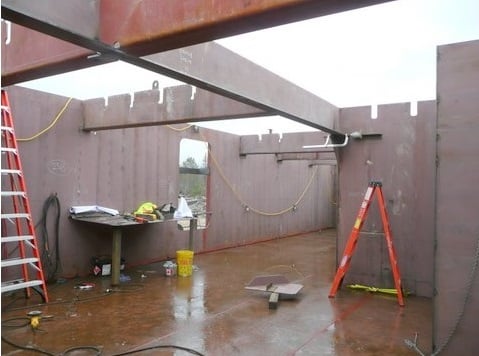
August 2013 - June 2014: From Floating Hull to Finished Vessel.


With the vessel now floating, it is little more than an empty steel hull.  We now embark on installing all the machinery, miles of piping and wiring, plus building all the structure above the car deck.
With the vessel now floating, it is little more than an empty steel hull. We now embark on installing all the machinery, miles of piping and wiring, plus building all the structure above the car deck.
Fabrication of the deckhouse and wheelhouse.
Electrical Switchboards being lowered into the vessel.
Propeller installation
Engine installation
Engine installation
Engineering control room wiring
Painting and installing navigation electronics
Interior finishing on the crew deck
Turning the vessel around so we can finish the aft ramps
First Sea Trial
First Sea Trial
Interior painting complete
The DEV Galena in her last week of service with the MV Columbia in the background ready to replace her.
The MV Columbia in her first week of service
0
WaterBridge Steel's MV Columbia Construction Team


A very skilled and hardworking group that has taken immense pride in the building of the MV Columbia.

Time Lapse Video of 'On Land' Construction Phase of the MV Columbia

Time Lapse Video of 'On Water' Construction Phase of the MV Columbia

close lightbox